前言
网络请求到数据解析是一个app必不可少的流程之一,在flutter官网中目前主要是介绍 自带的Http请求+Json解析 但是也推荐了更好的网路请求到组合的方式 dio 和 json_serializable,本篇文章主要介绍这两个方式的使用,源码在结尾
dio
简介
package地址 https://pub.flutter-io.cn/packages/dio,
添加依赖
dependencies:
dio: ^1.0.9
支持了支持Restful API、FormData、拦截器、请求取消、Cookie管理、文件上传/下载、超时等
Performing aGETrequest: 简单的使用如下
1 | Response response; |
Performing a POST request:
1 | response=await dio.post("/test",data:{"id":12,"name":"wendu"}) |
Performing multiple concurrent requests:
1 | response= await Future.wait([dio.post("/info"),dio.get("/token")]); |
Downloading a file:
1 | response=await dio.download("https://www.google.cn/","./xx.html") |
Sending FormData:
1 | FormData formData = new FormData.from({ |
Uploading multiple files to server by FormData:
1 | FormData formData = new FormData.from({ |
并且由于flutter原生的网络库http不支持charles抓包,这个库可以使用设置代理来达到抓包的目的,ip自己替换
1 | dio.onHttpClientCreate = (HttpClient client) { |
这样就可抓包了。
网络请求封装使用
简单封装使我们更加容易的使用,核心代码如下
1 | void _request(String url, Function callBack, |
使用如下
1 | HttpCore.instance.get(Api.HOME_BANNER, (data) { |
坑
在封装网络库的的时候发现 底层 response.data[‘data’]时候当是一个jsonarray时候竟然无法直接取出’data’,”Stirng not subType of Index “错误,原因是 此时拿到的不是一个json数据,没有双引号的假json数据,但是在jsonobject却可以,解决如下
1 | if (callBack != null) { |
json_serializable
简介
package地址 https://pub.flutter-io.cn/packages/json_serializable
添加依赖
dependencies:
json_serializable: ^2.0.0
dev_dependencies
build_runner: ^1.1.2
json_serializable: ^2.0.0
这个是个好东西,之前的相当于json数据一个个通过key解出来(关于自带的json解析可以参考 https://juejin.im/post/5b5d782ae51d45191c7e7fb3#heading-7),不仅耗时而且容易出错,json_serializable 让我们直接反序列化成对象直接使用类似于Gson,而且还提供了一个工具来自动帮助我们生成代码,简单快捷而且不容易出错
使用
以json
1 | { |
为例,我们首先找到实际数据信息,因为异errorcode 之类的处理已在上面的封装网络请求中处理了,这里需要关注 实际内容传递者 “data”里面的数据,将上面这个data里面的jsonObject,从data 这个key后面包括大括号一起复制到上面的代码生成工具网页里面,截图如下
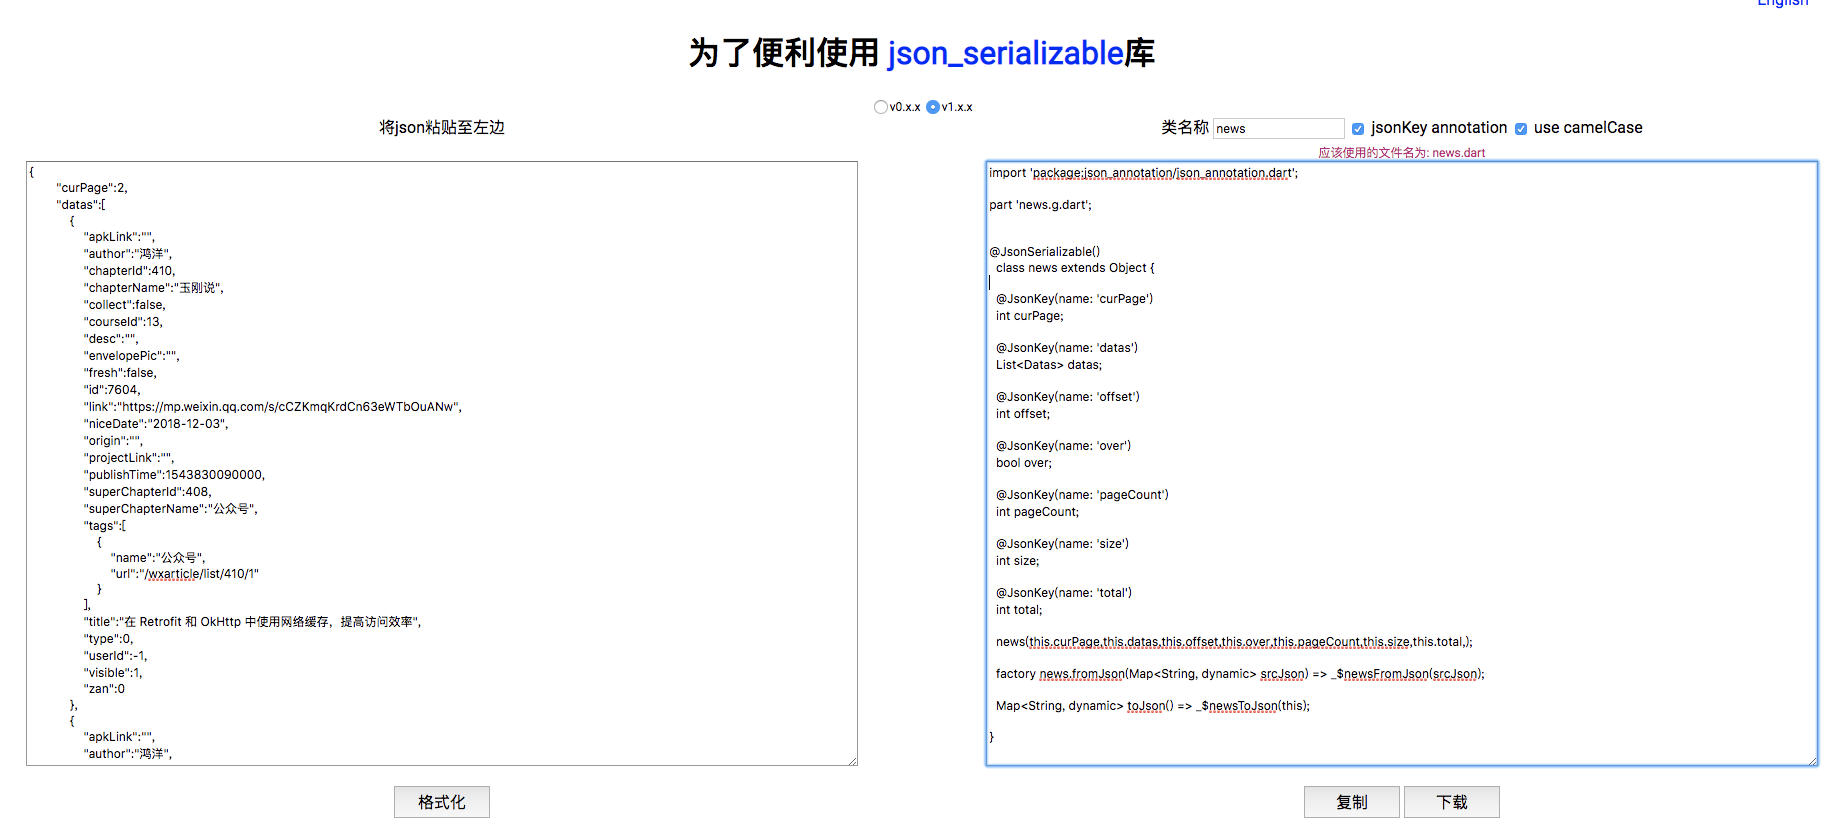
然后当前项目的目录下运行flutter packages pub run build_runner build
然就可以得到news.g.dart文件
然后在使用中通过获取对象属性的方式就可以直接拿到我们关注的字段了
1 | // 获取News数据 |
其他
自定义字段的处理
我们可以通过JsonKey自定义参数进行注释并自定义参数来自定义各个字段。例如:是否允许字段为空等。注意,这里不加任何JsonKey默认允许空json字段。
比如解析字段有个横线,而dart中只允许字母数字下划线作为变量名。所以我们必须对它进行特殊处理。@JsonKey(name="Nicehash-CNHeavy")来解析map,通常自动生成代码的工具已经可以帮助我们解决了
1 | (name: 'off-set') |
实践
效果如下图
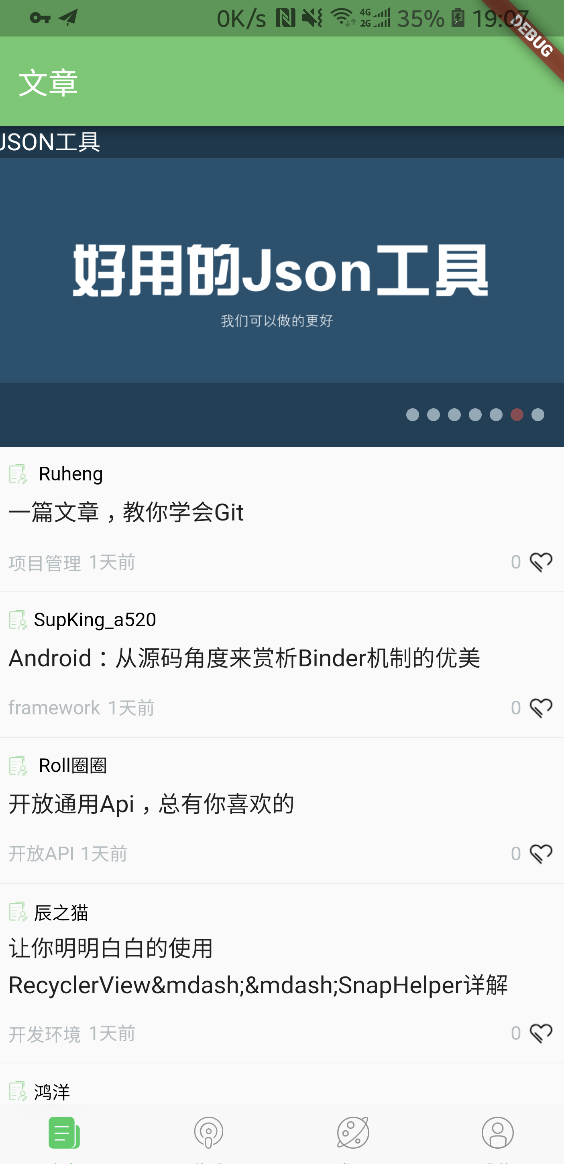
接口来自 玩Android的开放接口
代码在 learnflutter 的demo3